8. Configure the commercial collaboration view
Collaboration brings the adjustments made by the Demand Planning, Marketing, and Sales teams into the same Demand Plan. In Community Edition, all demand collaboration is carried out through an interface called the Planning Book, where users can view or adjust the demand plan.
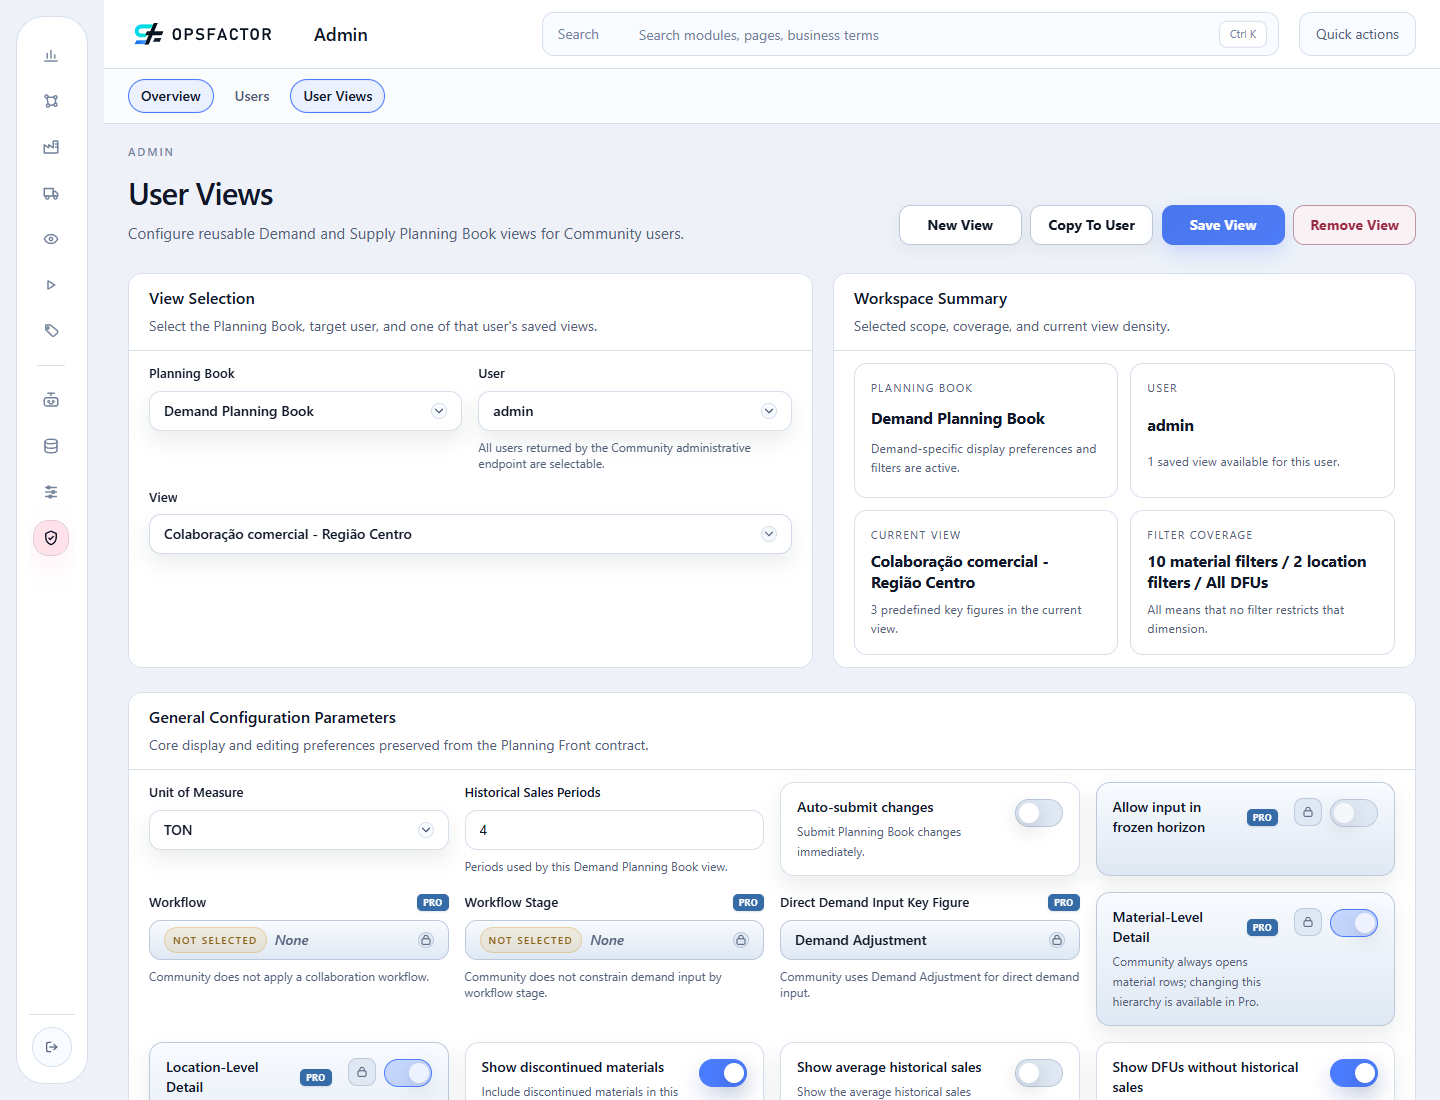
Each user can have different views that can be opened in the Planning Book, with product/customer selections suited to the needs of each collaboration. This chapter creates a collaboration view with:
- a customer filter;
- a selection of key figures, which represent different components of the demand plan or supporting calculations.
1. Open User Views
Hover over Admin and open Access and Views > User Views.
2. Create the view
In View Selection, select Demand Planning Book and your user (in this
example, admin). Then click New View, enter
Colaboração comercial - Região Centro as the view name, and click
Create view.
3. Set the general parameters
Select TON as the view's unit of measure, enter 4 historical sales
periods, and keep Auto-submit changes off. Adjustments then remain pending
until the user submits them from the Planning Book.
4. Confirm the standard key figures
The Community Edition provides the standard three key figures in a fixed order. Confirm them in Visible key figures; selection is fixed in this edition:
- Direct Demand — the final collaborated number, formed by Baseline + Demand Adjustment;
- Baseline — the statistical projection generated when the demand plan is run, read-only;
- Demand Adjustment — the line used to enter the areas' adjustments: values are a positive or negative delta on the baseline.
5. Select the finished goods
Community 2026.09.22 supports explicit material and location identifiers in a view. Custom-characteristic filters and characteristic grouping require Enterprise.
Use the material master data from chapter 2 to identify Estágio do material = Produto acabado. In Material Aggregation and Filters, select these ten identifiers in the individual-material control:
PA_BRANCO_75_A4_100;PA_BRANCO_75_A4_50;PA_BRANCO_75_CARTA_100;PA_BRANCO_75_CARTA_50;PA_BRANCO_90_A4_100;PA_BRANCO_90_A4_50;PA_COPIA_A4;PA_PREMIUM_A4;PA_SANITARIO_DUPLO_12;PA_SANITARIO_TRIPLO_12.
This list preserves the exercise's finished-good scope. Review the selected identifiers when new products are added to the master data.
6. Select the Central Region customers
The location master data identifies two customers with Customer Region = Central. In Location Aggregation and Filters, select:
REGIONAL_CENTRO_DIRETO— Central Region, direct channel;REGIONAL_CENTRO_INDIRETO— Central Region, indirect channel.
7. Save and confirm the view
Click Save View. Reopen the view and confirm ten materials, two locations, TON, and four historical periods. The Planning Book selection contains 20 material-location combinations before key figures are expanded.
If shown, All DFUs means no additional filter on individual combinations. The material and location lists still restrict the selected data.
Completion criterion
The view is ready when the user can select
Colaboração comercial - Região Centro in the Planning Book with the
three standard key figures, four history periods, and only the filtered
materials and locations.
Return to the persisted Demand Plan, or continue with collaboration and adjustments.